
















Installation, upgrade and uninstall
You install the module like any other PrestaShop module. It works right away with sensible defaults: the notice is shown at once, and no product carries a GARAN label until you declare one.
Install from the Module Manager
- Download the module’s zip file from your PrestaShop Addons account. Do not unzip it.
- In your back office, open Modules › Module Manager.
- Click Upload a module (top right) and select the zip file, or drop it into the window.
- Wait for the message Module installed! and click Configure. The settings page opens on the Compliance checklist.
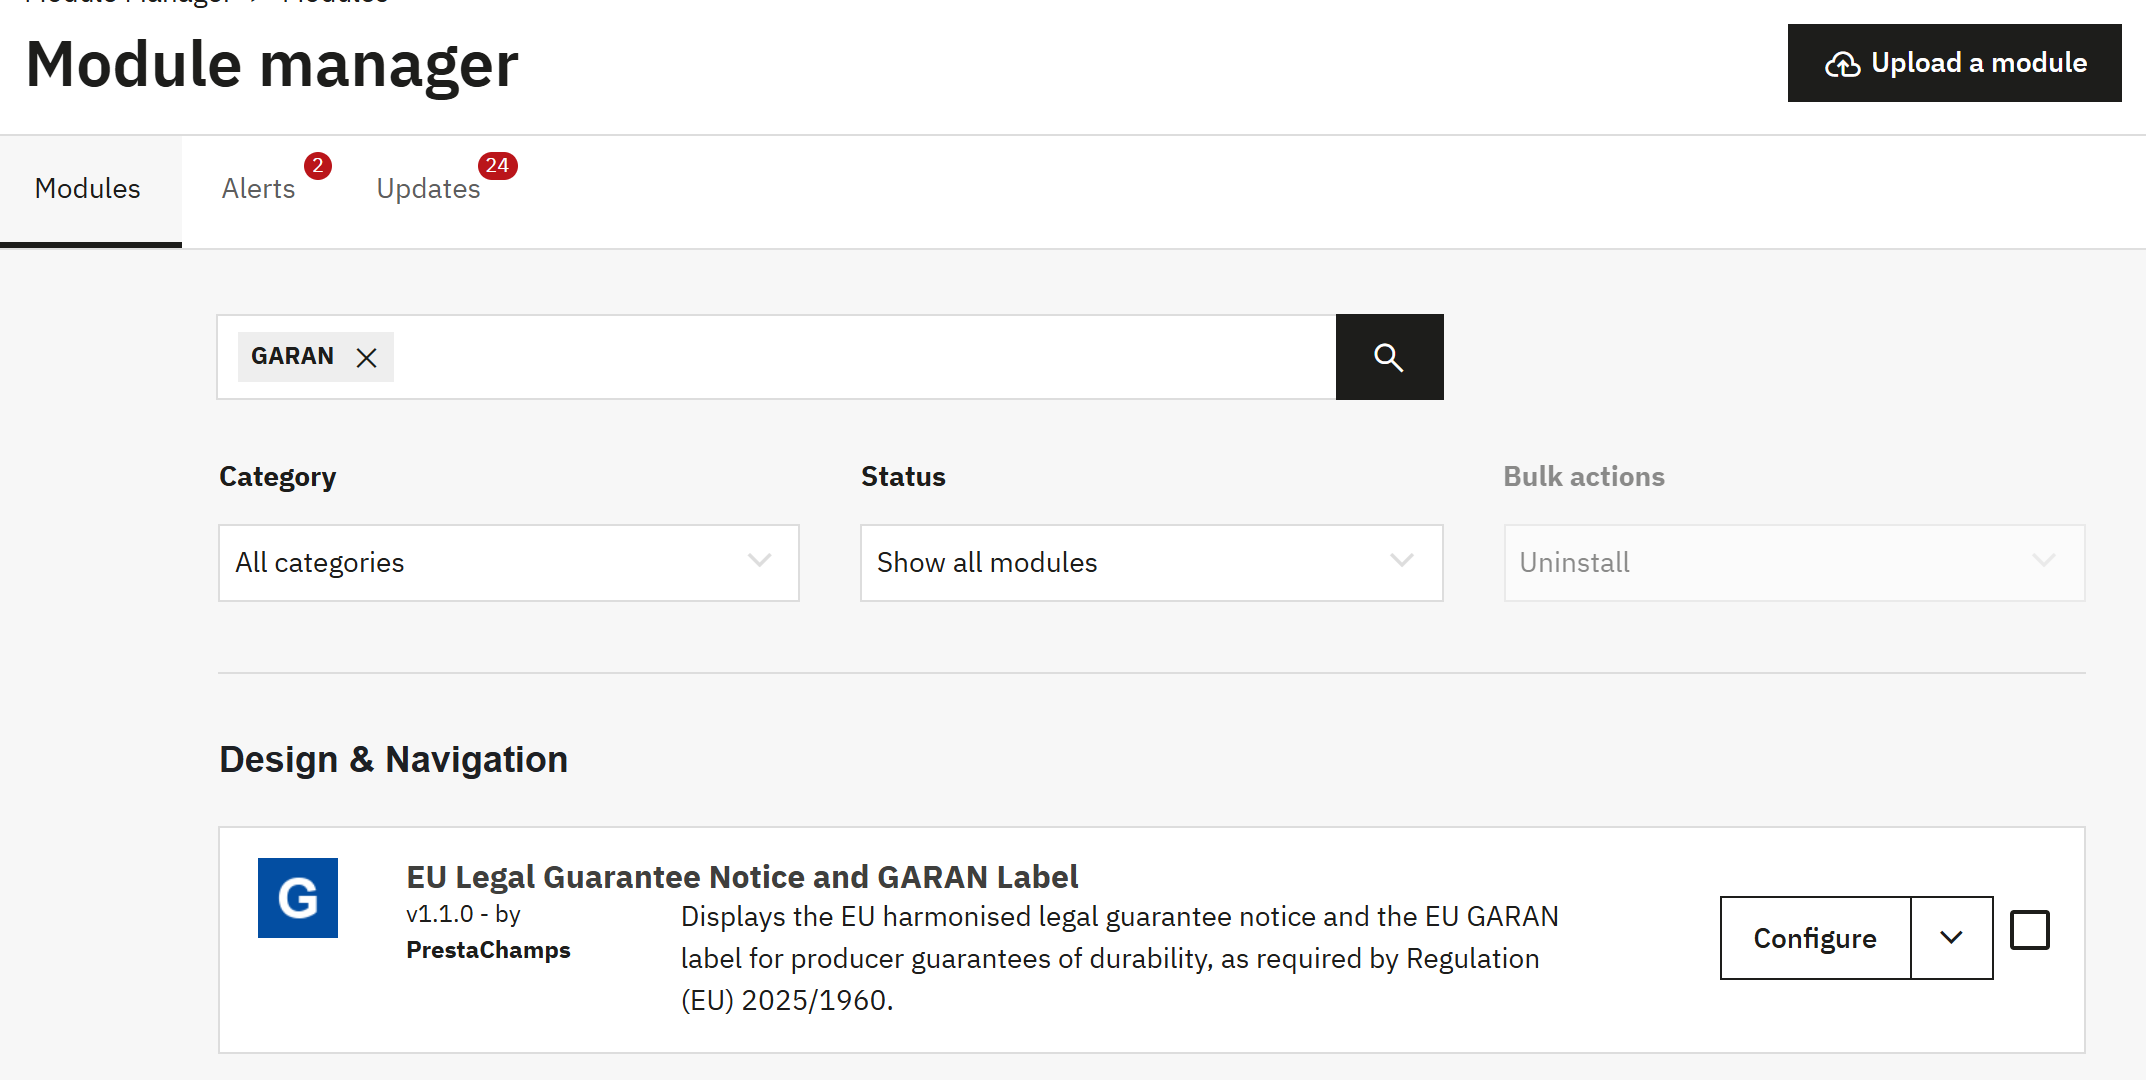
- Upload a module opens the upload window.
- Configure opens the module’s settings.
Later you reach the settings the same way: Modules › Module Manager, search for “GARAN”, then Configure on EU Legal Guarantee Notice and GARAN Label. The module adds no entry to the back-office menu.
Install by FTP when the upload is too large
If the upload stops with a size error, or nothing happens for a long time, your host accepts only files smaller than the 6.5 MB zip.
- Unzip the file on your computer. You get a folder named
eugaranlabel. - With your FTP or SFTP program, open the folder where PrestaShop is installed (it contains
config,modules,themesand so on). - Upload the whole
eugaranlabelfolder intomodules, so that you getmodules/eugaranlabel. Keep the folder name exactly as it is. - In the back office, open Modules › Module Manager, search for “GARAN” and click Install, then Configure.
What the installation sets up
- Two small database tables for the product guarantees and the brand rules.
- The storefront, back-office and email hooks the module needs.
- The folder
img/eugaranlabel/, where the rendered label images are kept. - The settings page, reached from the Module Manager, with the default settings below.
| Setting | Default after installation |
|---|---|
| Legal guarantee notice | On, in the header, the footer, below category lists, on product pages, in the cart and at checkout |
| Open the notice on | Click |
| Style of the notice link | Text link |
| Notice in the order confirmation email | Inline image and link |
| GARAN label | On: product page, product cards, cart lines, checkout and emails |
| Products with a label | None, until you set a guarantee (Setting a guarantee on one product and Setting guarantees in bulk) |
| Producer guarantees of 2 years or less | Not shown (Short producer guarantees) |
| Texts for customers | The official wording in each of your shop languages |
Compression and caching of the label images
Every label image gets a new file name whenever the label changes, so browsers can keep the files for a long time.
- Apache (most shared hosting): nothing to do. The installation writes an
.htaccessfile intoimg/eugaranlabel/that turns on compression and a one-year browser cache when your server supports it. An existing file there is left unchanged. - nginx ignores
.htaccessfiles. Ask your host to add SVG to the compressed types and, optionally, a long cache for the folder:
gzip_types image/svg+xml;   # add to your existing gzip_types list

location ^~ /img/eugaranlabel/ {
    expires 1y;
    add_header Cache-Control "public";
}
Upgrade to a new version
- Download the new zip from your PrestaShop Addons account.
- Upload it exactly like the first time: Modules › Module Manager › Upload a module. PrestaShop recognises the newer version; on PrestaShop 8 and 9 the upload runs the upgrade directly.
- On PrestaShop 1.7.8 the upload sometimes only copies the new files. The Module Manager then shows an Upgrade button next to the module: click it to finish the upgrade, and confirm with Upgrade anyway if PrestaShop asks.
- Open Configure and read the Compliance checklist.
Your settings, product guarantees and brand rules are kept. If a storefront page still shows old texts, clear the cache in Advanced Parameters › Performance › Clear cache.
Disable, reset or uninstall
| Action | What happens |
|---|---|
| Disable | The notice and the labels disappear from your shop and emails. Everything is kept; enable the module again to get it all back. |
| Reset | Uninstalls and reinstalls the module: the settings go back to the defaults and your product guarantees and brand rules are deleted. |
| Uninstall | Deletes the module’s tables (product guarantees and brand rules), its settings and the rendered label images. Your products, brands and product features are not touched. |
Quick start: compliant in 5 minutes
The notice is shown as soon as the module is installed. These five steps check it, give your first products their GARAN label and confirm that the order emails carry both.
Step 1: open the compliance checklist
- Open Modules › Module Manager, search for “GARAN” and click Configure.
- The settings page opens on Overview › Compliance checklist. Each line is a live check of your shop.
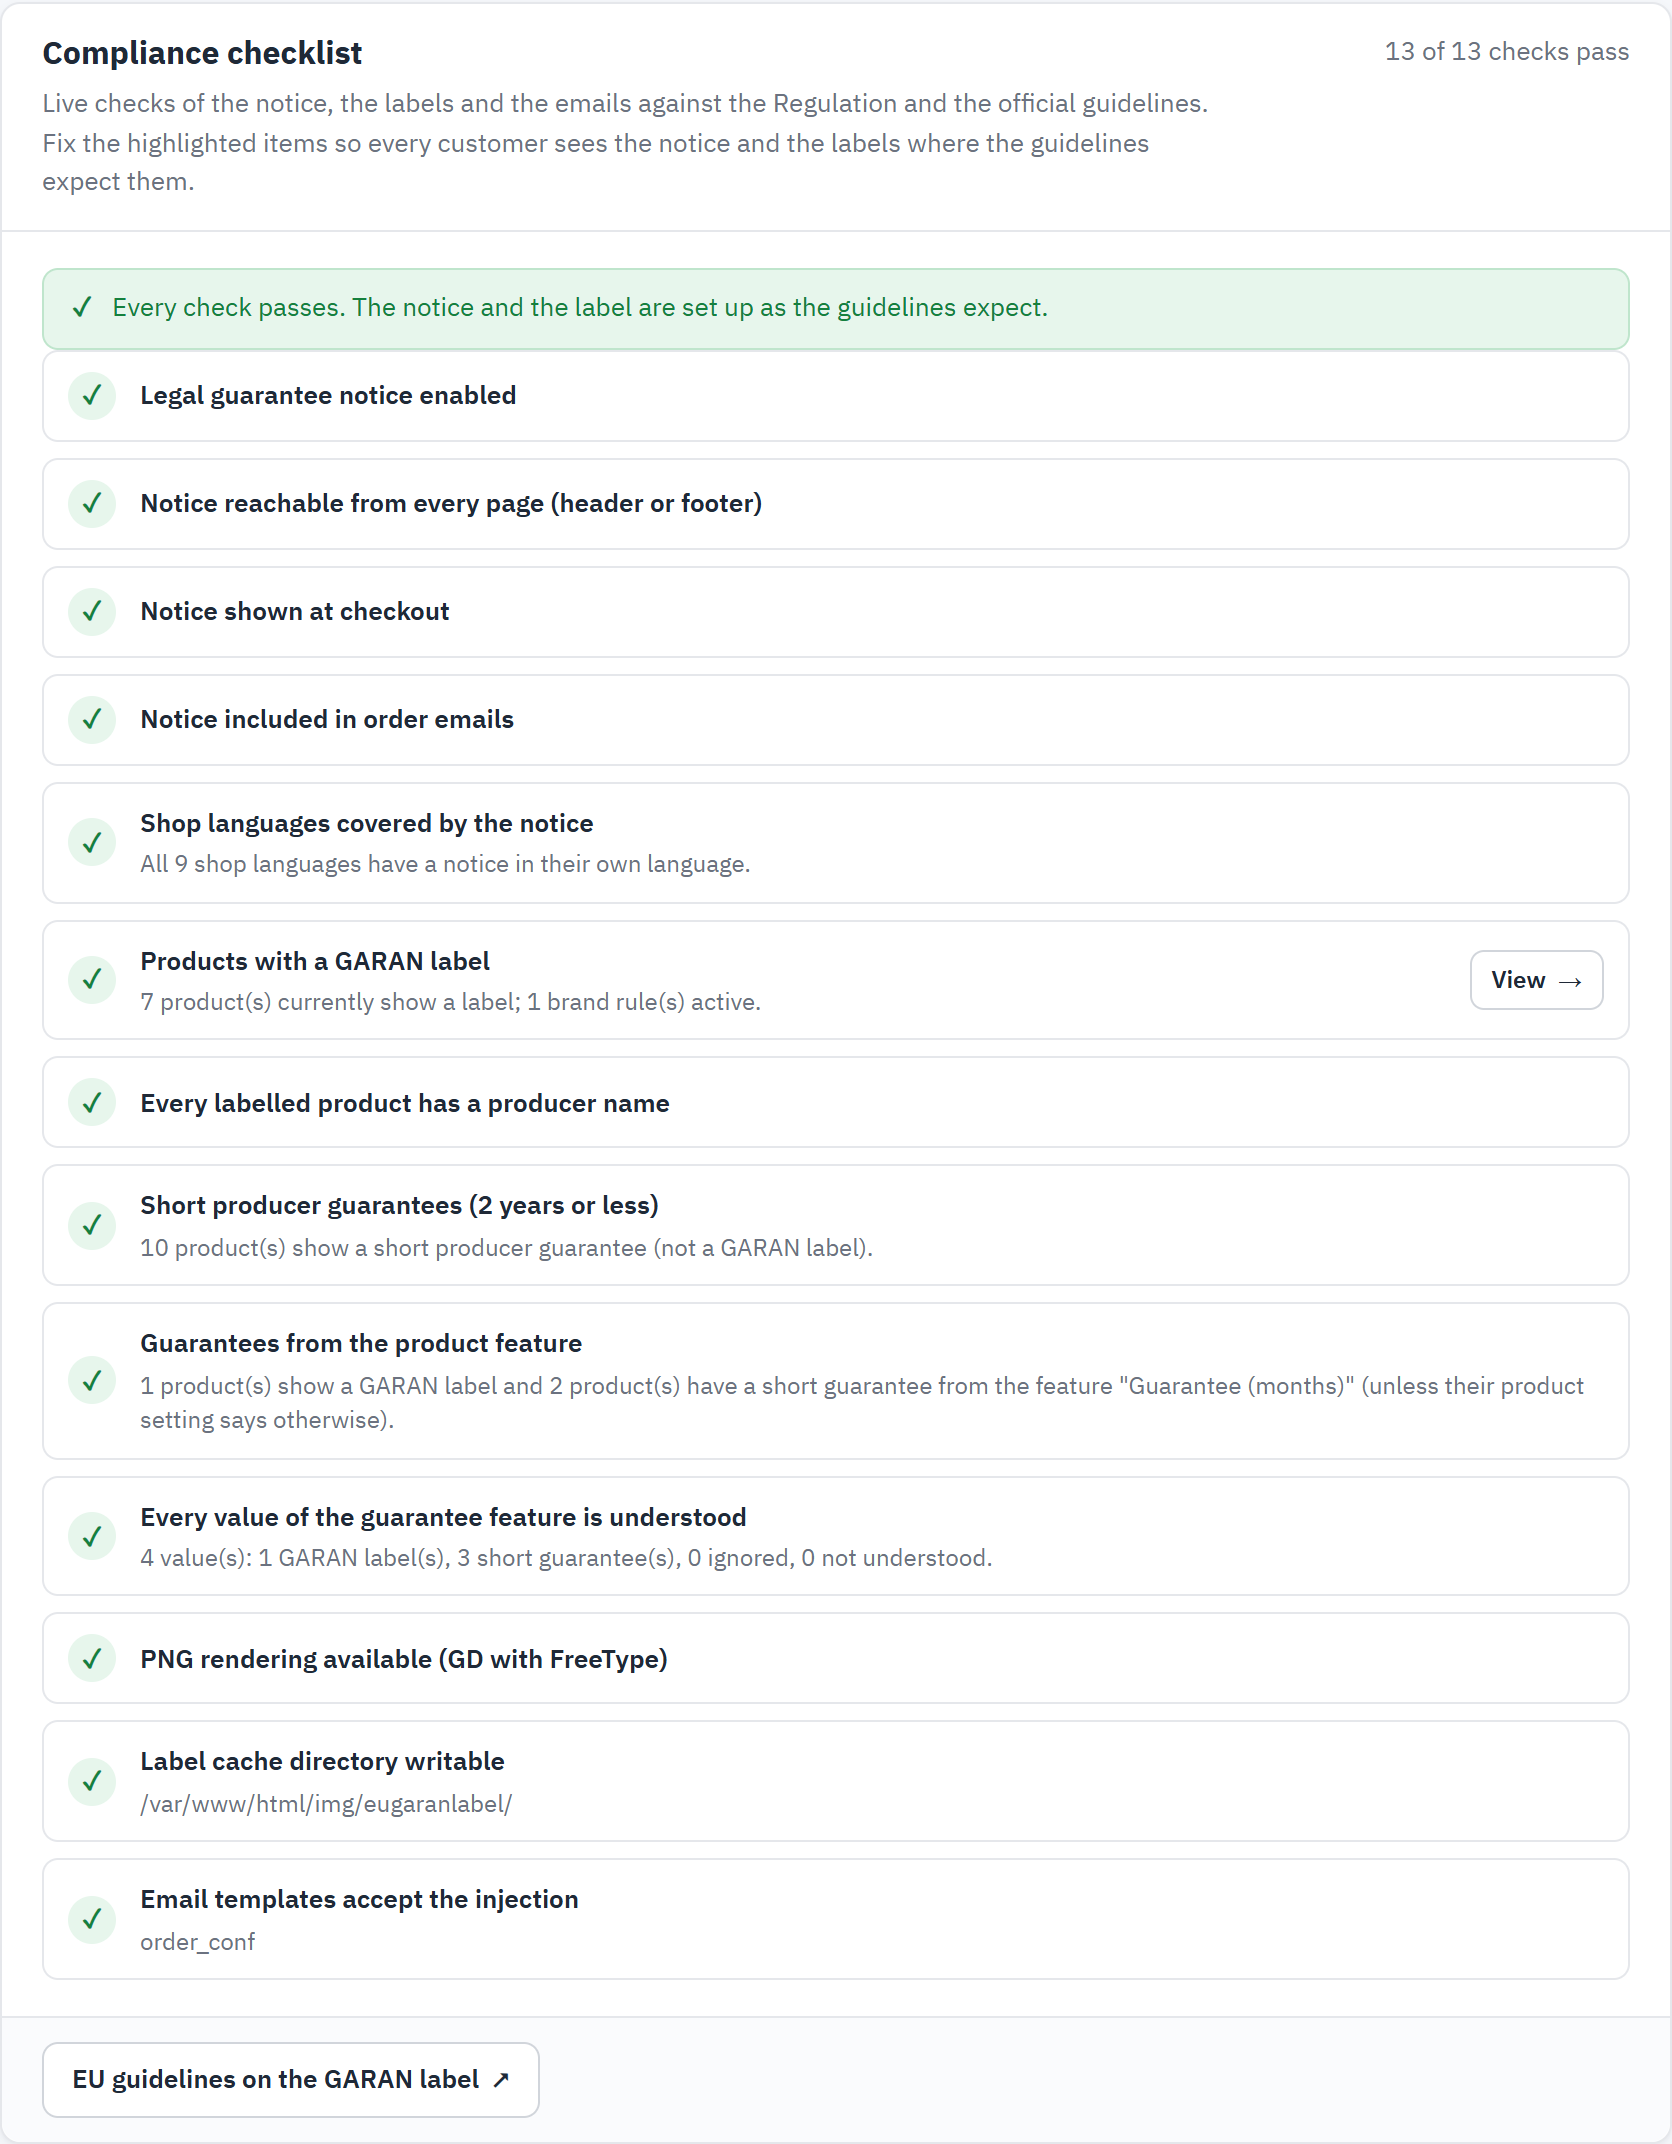
- How many checks pass. Aim for all of them.
- The summary: green when every check passes, amber when something needs your attention.
- A check with its explanation. A line that fails says what to change.
- Fix (or View) opens the section where you change it.
- The official guidelines on the European Commission’s website.
Right after installation the notice checks are green. If a line is amber, click its Fix button and follow the hint. Overview › Compliance checklist explains every check.
Step 2: look at the notice
Click Preview notice at the top of the settings page. The pop-up opens exactly as your customers see it, with the official notice and the link to the Your Europe page. Close it with the × button or the Escape key.
Nothing else is needed for the notice: it is already in the header, the footer, below category lists, on product pages, in the cart, at checkout and in the order confirmation email.
Step 3: give your first products their GARAN label
The quickest way is a brand rule, when a producer gives the same guarantee on all its products:
- Open GARAN label › Brand rules.
- Find the brand (the Filter brands box helps) and enter the guarantee in years, for example
5. - Leave Active ticked and click Save brand rules.
Every product of that brand now shows the label with its brand name and reference. The other ways to set guarantees:
- one product at a time, on the product page: Setting a guarantee on one product;
- from a product feature your catalogue already has, such as “Guarantee: 3 years”: A product feature as the source;
- many products at once, by category: Assign guarantees: many products at once.
Step 4: check the order confirmation email
- Open Emails › Order emails.
- In Send a test email, check the address in Send to and choose a Language.
- Click Send test email and open the email: it contains the notice and, if the most recent order has labelled products, their labels.
The test email needs at least one order in the shop. For a complete check, place a real order with a labelled product.
Step 5: look at your shop
- The header shows Your legal guarantee rights. Click it: the notice opens.
- A product page of the brand from step 3 shows the GARAN label. Click the label: it opens in full size.
- The category page shows the compact nested label on the product cards.
- In the cart and on the payment step of the checkout, the labelled products show their nested label.
- Switch the shop to another language: the notice and the texts follow the language automatically (Legal notice › Languages).
Back in the settings, the Compliance checklist now counts your labelled products. You are done. The rest of this guide explains every setting in detail.